


OFFICIAL MEDIA CHANNELS
New film trailers and videos
Check us out!
Check out Unreal Radio!
| The Unreal Film Festival is owned and managed by Cellardoor Cinema. Copyright 2015. |
The more that SFX infused programs like The Walking Dead and American Horror Story become
more mainstream, so too does the amount of FX supplies and materials become available for the
general public. And one popular option that's been on the market for around 10 years now, is liquid
latex.
But before we go any further, a warning: LATEX CAN CAUSE ALLERGIC REACTIONS. NEVER
USE LATEX MAKE-UP APPLICATIONS ON SOMEONE UNLESS YOU KNOW THEY ARE NOT
ALLERGIC TO LATEX.
Okay, now that my safety-above-all rant is complete. Let’s get into some tips and tricks of this
wondrous compound that helps us artists go wild.
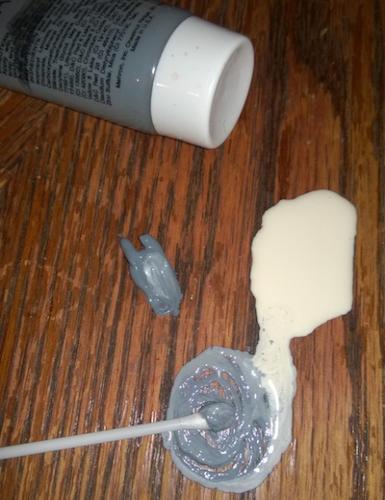
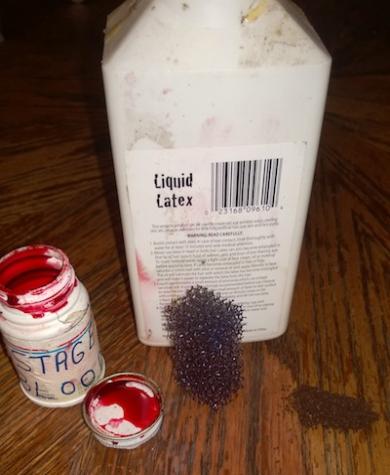
1. Mixing Liquid Latex with Colors:
Cream make up colors (and some grease paints) actually mix perfectly with liquid latex to color it.
And while pre-colored liquid latex can be purchased easily, mixing the colors with the latex yourself
will give you more options and help you customize your look.
more mainstream, so too does the amount of FX supplies and materials become available for the
general public. And one popular option that's been on the market for around 10 years now, is liquid
latex.
But before we go any further, a warning: LATEX CAN CAUSE ALLERGIC REACTIONS. NEVER
USE LATEX MAKE-UP APPLICATIONS ON SOMEONE UNLESS YOU KNOW THEY ARE NOT
ALLERGIC TO LATEX.
Okay, now that my safety-above-all rant is complete. Let’s get into some tips and tricks of this
wondrous compound that helps us artists go wild.
1. Mixing Liquid Latex with Colors:
Cream make up colors (and some grease paints) actually mix perfectly with liquid latex to color it.
And while pre-colored liquid latex can be purchased easily, mixing the colors with the latex yourself
will give you more options and help you customize your look.
|
|
| Unreal Film Fest Sponsors: |


Stay up to date on Fest News

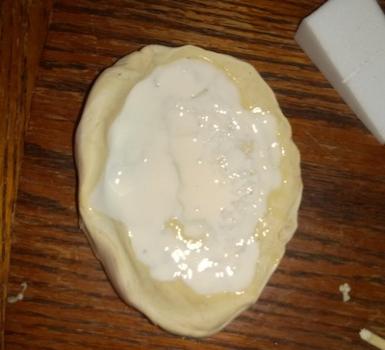
2. Prosthetic Appliances:
Curing overnight, or faster with the help of a hair dryer, using liquid latex to create prosthetic
appliances can save you in a pinch. Keep some oil-based clay around for making fast molds to
pour liquid latex into, and you will have all that you need for light weight, very pliable and
easy-to-apply pieces as required.
| (Mixing Liquid Latex with grey paint.) |
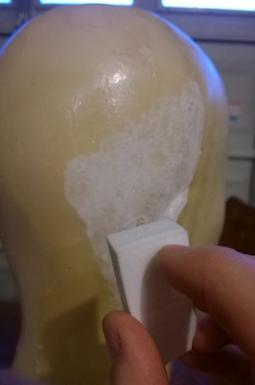
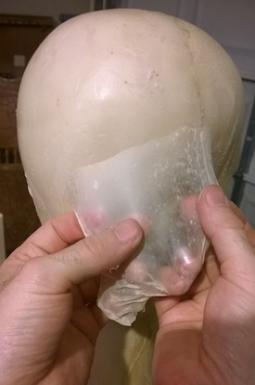
3. Latex Bald Caps:
Say you need a bald cap, but the stores are closed or you haven’t the time to order one online.
With a little more work, you can create one yourself using liquid latex. A little more complicated this
time, you’re going to need either a mannequin head, a head armature (like one you’d sculpt on) or
even a very slick-headed, bald friend. Now, all you need is a soft, small-celled make up sponge
because you are going to be dabbing the liquid latex on your head shape – no pouring or brushing,
just dabbing. You’ll know when you have a decent enough thickness. This again can be set to
cure overnight or if in a rush, the curing process can be sped up by using a hair dryer at about a
foot distance. When the cap has finished curing, make sure you powder the outside of it before
peeling it off, or you’ll wish you had.
| (Quick prosthetic appliances using liquid latex.) |

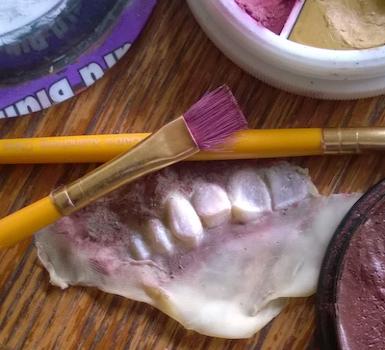
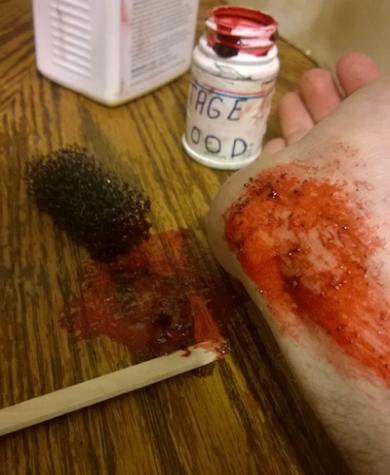
4. Rash and Scrape Effects:
Need a good road rash effect? A little liquid latex, some stage blood and some coffee grounds via
use of a stipple sponge will do the trick. Mix your ingredients making sure you have more of a
blood color than your latex color, and then it’s as easy as dabbing it on skin with the stipple sponge
followed by then raking slightly over it with the same sponge to create a scraped up look.
| (Bald cap creation using liquid latex.) |
5. Liquid Latex Recycling:
You messed up and need to start over. All the latex you poured got crammed up, stuck together
and horrible looking. DO NOT toss it in the trash. There is no such thing as wasted liquid latex.
Take those crummy pieces, get your stage blood and in just a few seconds you will have yourself
some torn, bloody flesh – what I like to call ghoul noms. They will look nasty enough for such gory
needs… trust me.
So if you're in a jam and need quick special FX, using liquid latex can be a great option. All of the
above examples were completed in 45 minutes or less. Liquid latex can be used for much more
than a last resort however, and if you have more time to work with it, you can wind up with some
very impressive pieces. This article was just a quick start, though and we’ll go over more thorough
usage for liquid latex and other forms of latex in the future.
Duane P. Craig is a writer and special FX artist in Memphis, TN and has been working in the
independent film industry since 2003.
Make-up Room photo by Nancy Fuentes
| (Rash/Scrape FX using liquid latex.) |